Battle of Cowpens
Introduction
Text-to-speech Audio
17 January 1781
Continental Victory
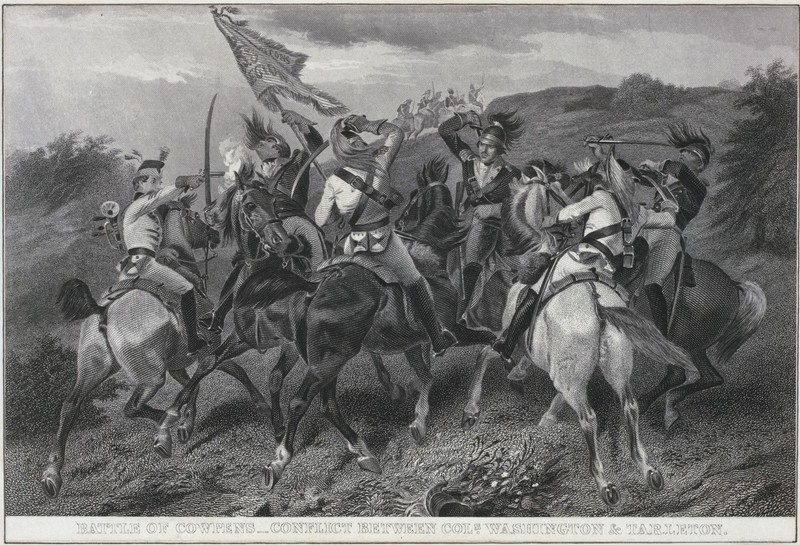
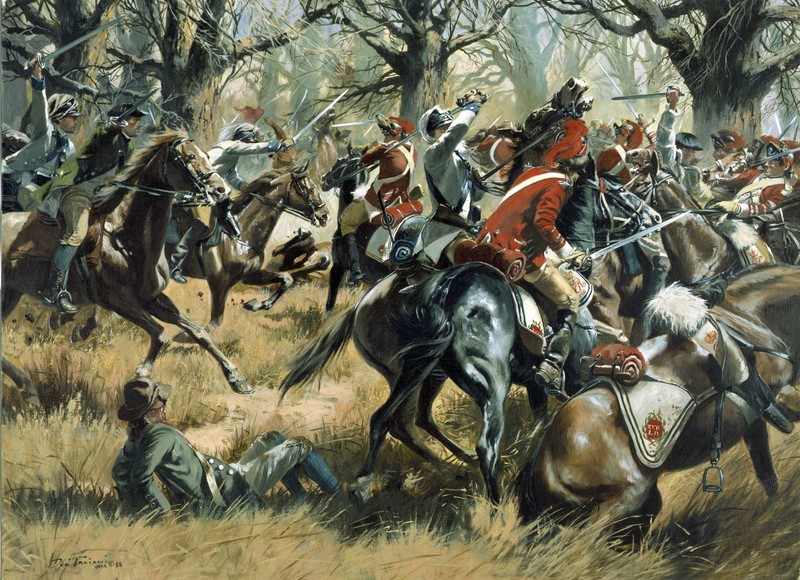
General Lord Charles Cornwallis directed his most trusted subordinate Lt. Col. Banastre Tarleton to engage Brig. Gen. Daniel Morgan’s Army which he thought would threaten the British outpost at Ninety Six, South Carolina. Throughout early January 1781, Tarleton and his legion of infantry and cavalry pursued Morgan and his men, although he was unsuccessful in bringing them to battle for weeks. Morgan decided to make a stand at Hannah’s Cowpens on 17 January, placing his militia in the first line, Continentals in the second, and riflemen on the flanks. Tarleton attacked immediately, only to have his cavalry driven back by accurate fire. When Tarleton’s infantry advanced, they drove back the militia, but then ran up against the main line of Continentals. As the advancing British force became disorganized, Morgan turned and attacked on both flanks, overwhelming the British. Tarleton fled the field with the survivors of his force. This engagement cost the British 30 percent in killed and wounded, with 55 percent of Tarleton’s force captured or missing.
Images
Battle of Cowpens - Conflict between Cols. Washington and Tarleton
Daniel Morgan's sword. This sword was believed to have been carried by Daniel Morgan during the Revolutionary War.

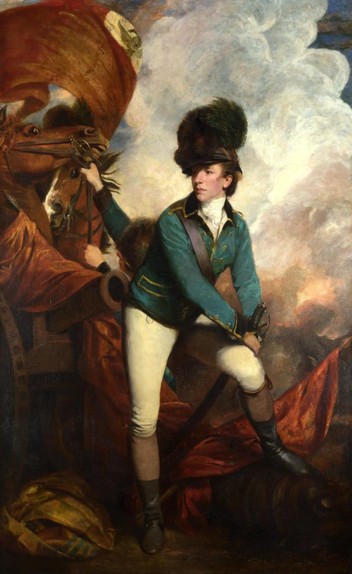
"Colonel Tarleton" by Sir Joshua Reynolds, 1782
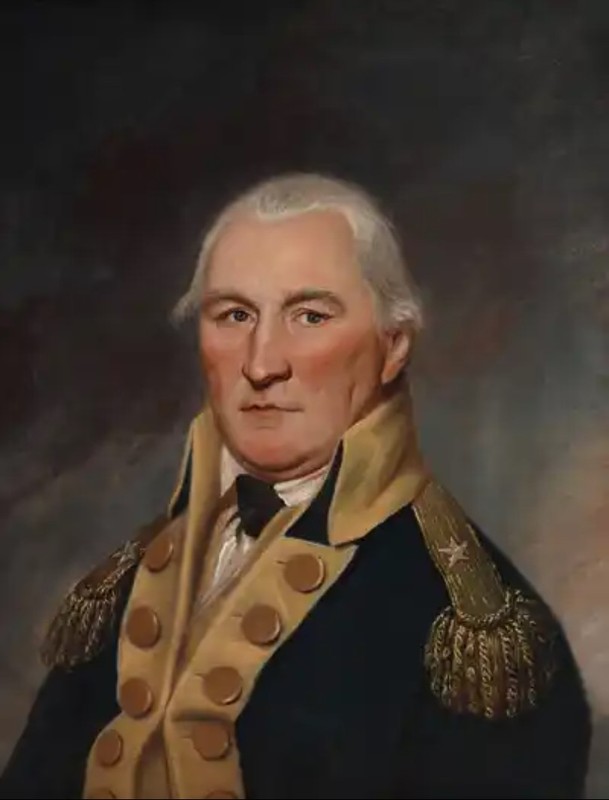
"Daniel Morgan" by Charles Willson Peale, 1794
"The Battle of Cowpens" by Don Troiani
Backstory and Context
Text-to-speech Audio
Morgan's use of a classic double envelopment was a clever use of the terrain and troops by one of the American Army’s most intuitive and inspirational commanders. Having struck this fatal blow against Tarleton, Morgan still had to move fast to escape Cornwallis. Covering 100 miles and crossing two rivers in five days, he rejoined General Nathanael Greene early in February.
At this point, Cornwallis was too heavily committed to the campaign in North Carolina to withdraw. Hoping to match the swift movement of the Americans, he destroyed all his superfluous supplies, baggage, and wagons and set forth in pursuit of Greene’s army. The American general retreated through North Carolina into southern Virginia and crossed to safety behind the Dan River. Cornwallis’ exhausted forces began to retreat into North Carolina to reach their depot and replenish their supplies. As the British started south, Greene recrossed the Dan and followed, keeping just out of reach of his adversary to avoid any battle he did not wish.
Sources
Boatner, Mark Mayo, Encyclopedia of the American Revolution, Stackpole Books, 1994.
Ferling, John, Almost a Miracle: The American Victory in the War of Independence, Oxford University Press, 2007.
Ferling, John, Whirlwind: The American Revolution and the War the Won It, Bloomsbury Publishing, 2015.
Middlekauff, Robert, The Glorious Cause: The American Revolution, 1763-1789. Oxford University Press, 2005.
Philbrick, Nathaniel, Valiant Ambition: George Washington, Benedict Arnold, and the Fate of the American Revolution, Penguin Books, 2017.
Savas, Theodore P. & J. David. A Guide to the Battles of the American Revolution, New York: Savas Beatie LLC, 2006.
Stewart, Richard W., ed. American Military History. 2nd ed. Vol. 1. American Historical Series. Washington, D.C.: Center of Military History, United States Army, 2009.
Tucker, Spencer, ed. American Revolution: The Definitive Encyclopedia and the Document Collection (5 volumes), ABC-CLIO Publishing, 2018.
The Miriam and Ira D. Wallach Division of Art, Prints and Photographs: Print Collection, The New York Public Library
Virginia Museum of History and Culture
The National Gallery, London
Virginia Museum of History and Culture
National Guard Heritage Painting, courtesy the National Guard Bureau