Battle of Mockbee's Farm Tour Stop 14 (Battle of Westport Driving Tour) (Price's Raid)
Introduction
Text-to-speech Audio
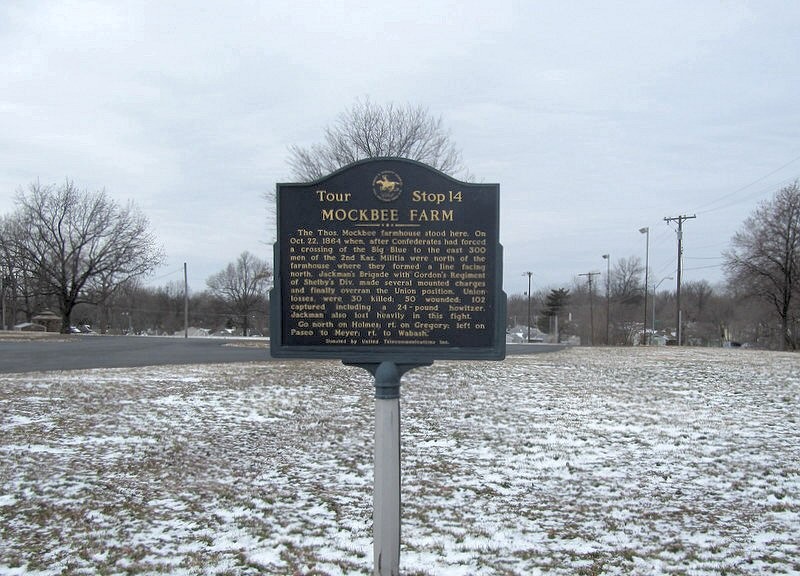
This historical marker was commissioned by the Monnett Battle of Westport Fund as part of a 23-stop Battle of Westport driving tour. The marker is at the approximate position of the 2nd Kansas State Milita stand at Mockbee's Farm. One of a series of engagements comprising the Battle of Westport, the fight at Mockbee's Farm on October 22, 1864, marked a decisive episode in the three-day battle known today as the "Gettysburg of the West." As the right flank of the Union defenses along the Big Blue River began to collapse and retreat to the Kansas state line, a Union militia regiment accidentally appeared in the rear of the Confederate pursuit, cutting the Rebels' assault short and giving Union forces time to recuperate and counterattack. The dramatic nature of the action at Mockbee's Farm, while part of the larger battle swirling around Byram's Ford that day, makes it one of the most memorable incidents in the climactic battle of Sterling Price's Missouri Expedition.
Images
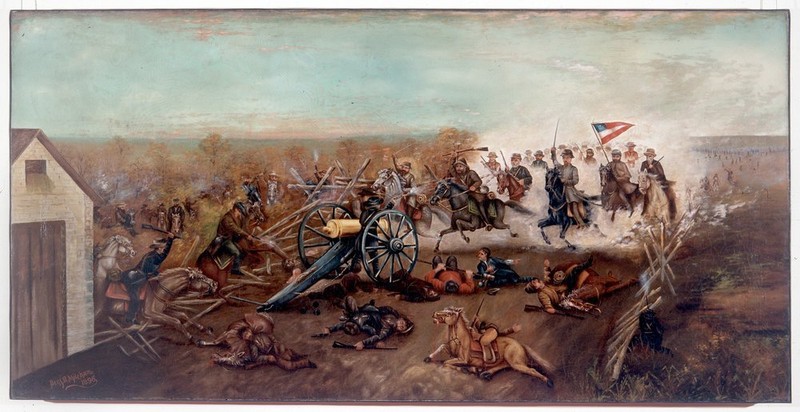
A painting of Ross Burns's howitzer in action at Mockbee's Farm, possibly commissioned by Burns himself. Courtesy of Kansas State Historical Society.
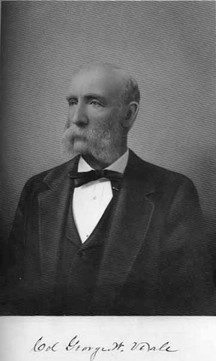
A postwar portrait of Colonel George W. Veale, commander of the 2nd Kansas State Militia, which bore the brunt of the fighting at Mockbee's Farm. Among other things, Veale was a railroad magnate, banker, and statesman, and figures prominently in early Kan
A 2013 photo of the present-day marker, by Bill Bechmann. The Monnett Fund has tirelessly worked to preserve and present the history of the Battle of Westport for decades, and sponsored the markers.
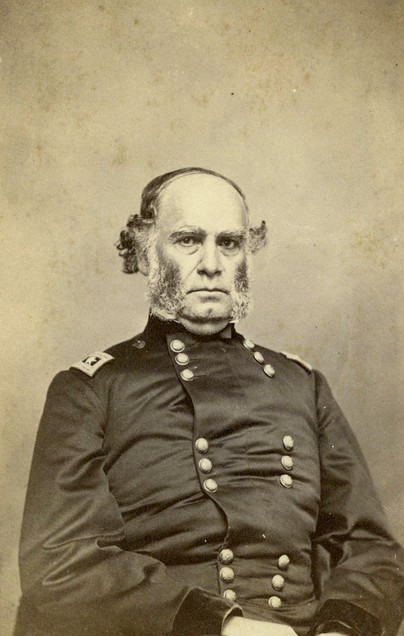
Union General Samuel R. Curtis. Though generally a competent commander, his tactical inflexibility on October 22 nearly lost the battle. His elan seemed to recover the following day during the fighting at Brush Creek.
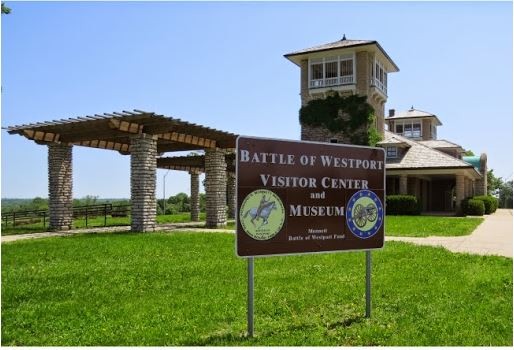
The nearby Battle of Westport Visitor Center and Museum contains a wealth of knowledge about the battle.
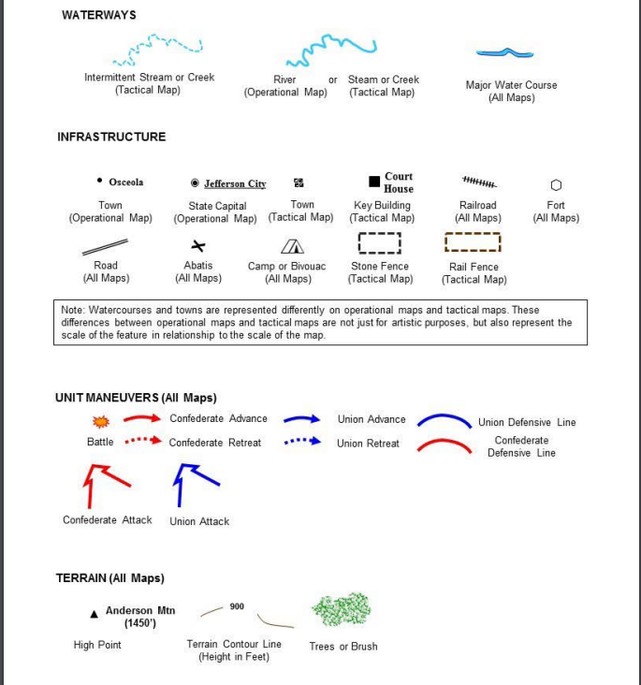
Map Key 1
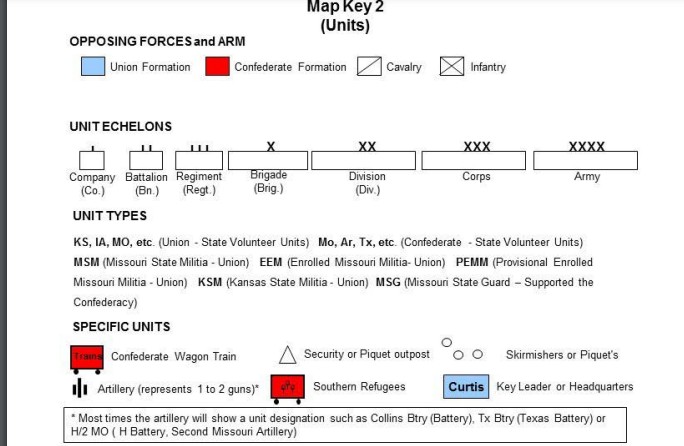
Wider overview of why Mockbee Farm happens
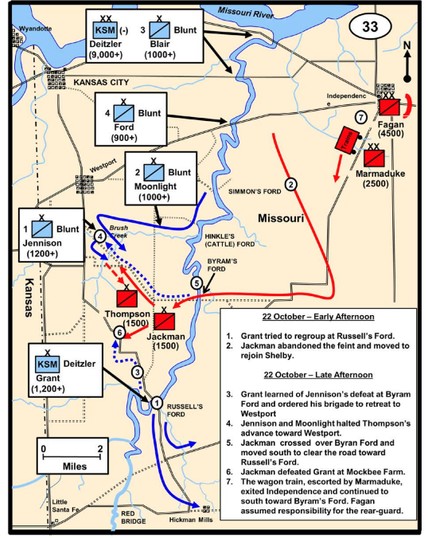
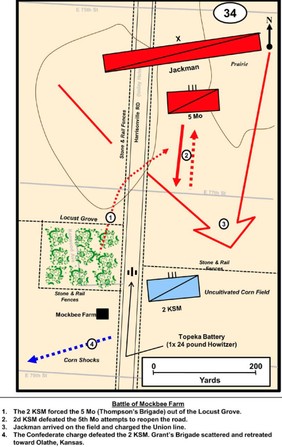
Battle of Mockbee Farm Map
Backstory and Context
Text-to-speech Audio
Though he had victoriously pushed Union troops out of Independence, Missouri, the previous day, Sterling Price was now at a crucial juncture of his invasion. Despite weeks of hard marching and fighting, Price had moved too slowly to seize his primary objectives: St. Louis and Jefferson City. Having failed to capture Missouri's capital and install a Confederate governor at the head of a new regime, he turned to his secondary objectives of gathering recruits and ravaging Union territory in Kansas.
After recruiting heavily in the Boonslick (a number of pro-Confederate counties near the Missouri River) and clashing with Union forces along the way, Price captured Independence on the evening of October 21, 1864. Just across the Big Blue River to the west waited a Union army 15,000-strong under General Samuel Curtis. Behind Price, galloping in from Jefferson City, were several thousand well-equipped, veteran Union cavalry under General Alfred Pleasonton.
On the morning of October 22, Price could see how strong Curtis's defenses were between the Confederates and Kansas City. He made the decision to bypass them altogether and attack at less fortified positions farther south. Curtis had unwisely left some of the Big Blue's southerly fords only lightly guarded. Despite a stout three-hour defense at Byram's Ford, Union troops under Colonel "Doc" Jennison were thrown back from their earthworks and were soon in full retreat northwest toward Shawnee Mission, at the Missouri-Kansas state line, where they were joined by reinforcements under Colonel Thomas Moonlight and General James Blunt in a desperate attempt to stabilize the southern Union flank.
In the meantime, a Union brigade of cavalry farther south, at Russell's Ford, was almost completely unaware of the happenings at Byram's Ford. A "hodgepodge of various [Kansas] county militias,"1 it included pieces of five different regiments and one 24-pounder howitzer, all under the command of a former grocer named Melvin S. Grant. Though his rank made him a general, Grant did not feel up to the task of brigade command and had repeatedly asked Curtis to replace him with someone more experienced. It was this inexperience that had led him to scatter much of his command in far-flung patrols that morning. Thus, the other four regiments of his brigade began to retreat piecemeal when word arrived of the Confederate breakthrough at Byram's Ford – and they did so without General Melvin Grant, who was out scouting with the 2nd Kansas State Militia (KSM). As they retreated northwest toward Kansas City, most of Grant's brigade was caught by the rapid Confederate advance and scattered or captured, leaving only the bewildered howitzer and its crew in the vicinity of Mockbee's Farm.
Whether brave or foolhardy, the howitzer's commander, Captain Ross Burns, decided to make a stand in a lane running through Mockbee's Farm, protected on either side by fences. There the 21-man crew unlimbered their gun and commenced firing at the oncoming Confederates. They were soon joined by the 2nd KSM, commanded by Colonel George Veale, which had finally caught wind of the fighting and now joined their artillerymen--as the only remaining combatworthy elements of Melvin Grant's brigade. Seeing the Confederate brigade of Frank Gordon massing to his front, Veale (a more experienced militia officer than most of the era) wished to withdraw to a stronger position but was overruled by Grant, who underestimated the Rebel strength and though reinforcements were on the way.
A see-saw of charge and countercharge followed, with both sides breaking and reforming several times. Ross Burns's howitzer poured canister shot into the oncoming Rebel charges, and the outnumbered Union militia were able to hold off several assaults. So tenacious was their defense that Confederate General Jo Shelby, one of Price's division commanders who had arrived to take charge of the battle, thought he was fighting Pleasonton's veteran cavalry, not the much-derided state militia. This overestimation of Yankee strength led him to call for reinforcements from the brigades of M. Jeff Thompson and Sidney Jackman – which had been busy chasing Jennison into Westport. Called away from this, the chance to smash through Samuel Curtis's weak right flank and into his rear was unknowingly lost.
At the time, this meant little to the men of the 2nd KSM. Three brigades of mounted Confederate cavalry charged down on their position. Burns's howitzer managed to discharge three final rounds of canister, ripping holes in the oncoming Rebel ranks. The Kansans were too sorely outnumbered, however. Their regiment was cut to pieces, and the remainder retreated in disarray, leaving behind over one hundred killed, wounded, or captured. Price's opportunity to flank Curtis's "Army of the Border" was gone, however. Blunt, Moonlight, and Jennison began arraying their forces near Brush Creek for battle on the morrow, which would see Price's army nearly surrounded and destroyed.
Marker Inscription: The Thos. Mockbee farmhouse stood here. On Oct. 22, 1864 when after Confederates had forced a crossing of the Big Blue to the east 300 men of the 2nd Kas. Militia were north of the farmhouse where they formed a line facing north. Jackman’s Brigade with Gordon’s Regiment of Shelby’s Div. made several mounted charges and finally overran the Union position. Union losses were 30 killed, 50 wounded, 102 captured including a 24-pound howitzer. Jackman also lost heavily in this fight.
Sources
1. Sinisi, Kyle S.. The Last Hurrah: Sterling Price's Missouri Expedition of 1864. Rowman & Littlefield, 2015. pp 202.
2. Swain, Craig. Pleasonton, Price, and the Big Blue River. To the Sound of the Guns. October 22, 2014. Accessed December 11, 2017.https://markerhunter.wordpress.com/prices-1864-raid/
3. Collins, Charles Jr. D.. Battlefield Atlas of Price’s Missouri Expedition of 1864. Fort Leavenworth, Kansas. Combat Studies Institute Press, 2016.
Collins, Charles D. Battlefield Atlas of Price’s Missouri Expedition of 1864. Fort Leavenworth, KS: Combat Studies Institute, US Army Combined Arms Center, 2016.
Collins, Charles D. Battlefield Atlas of Price’s Missouri Expedition of 1864. Fort Leavenworth, KS: Combat Studies Institute, US Army Combined Arms Center, 2016.
Collins, Charles D. Battlefield Atlas of Price’s Missouri Expedition of 1864. Fort Leavenworth, KS: Combat Studies Institute, US Army Combined Arms Center, 2016.
Collins, Charles D. Battlefield Atlas of Price’s Missouri Expedition of 1864. Fort Leavenworth, KS: Combat Studies Institute, US Army Combined Arms Center, 2016.

