Sedgwick Retreats, May 4-5
Introduction
Text-to-speech Audio
Salem Church, Part XII: After Lee’s assault on the Union left and still without concrete orders from Hooker, Sedgwick decided to withdraw his corps to a safer position near Scott’s Ford in preparation for cross the Rappahannock to safety. Overnight from May 4 to May 5 Sedgwick crossed the VI Corps at Scott’s Ford.
Images
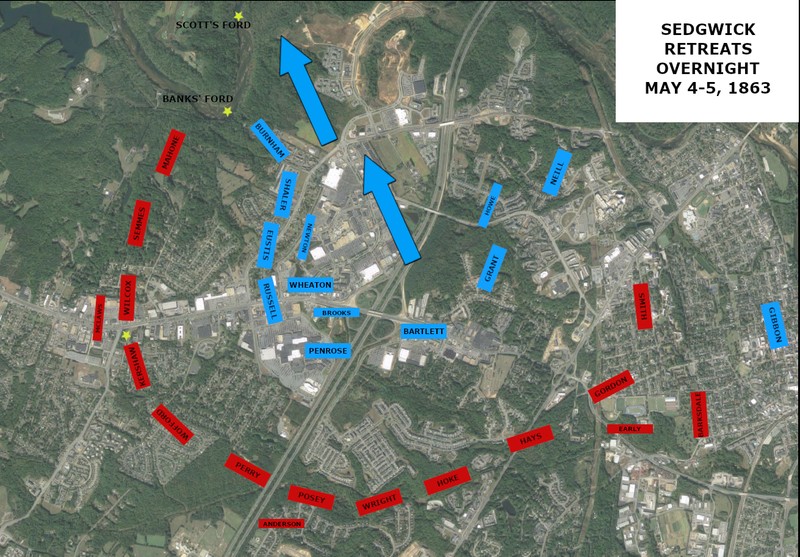
Sedgwick withdraws his VI Corps and retreats over the Rappahannock River, May 4-5 (map by Kathleen Thompson)
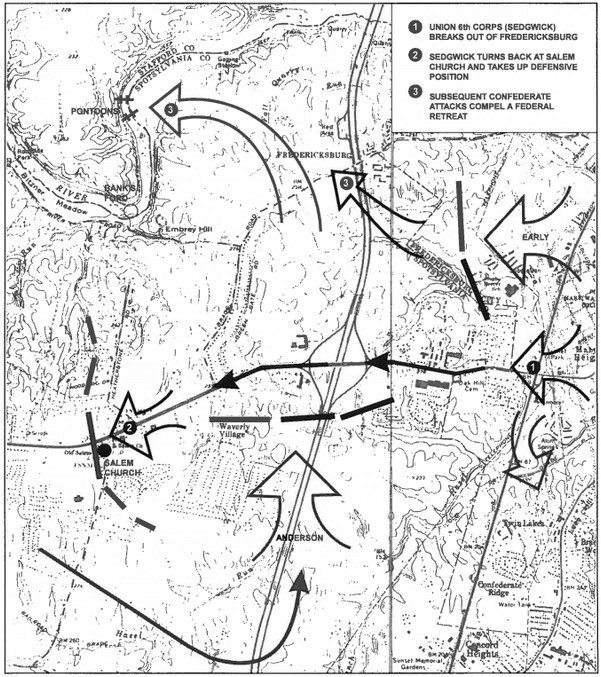
Map showing pontoon bridges and retreat at Scott's Ford
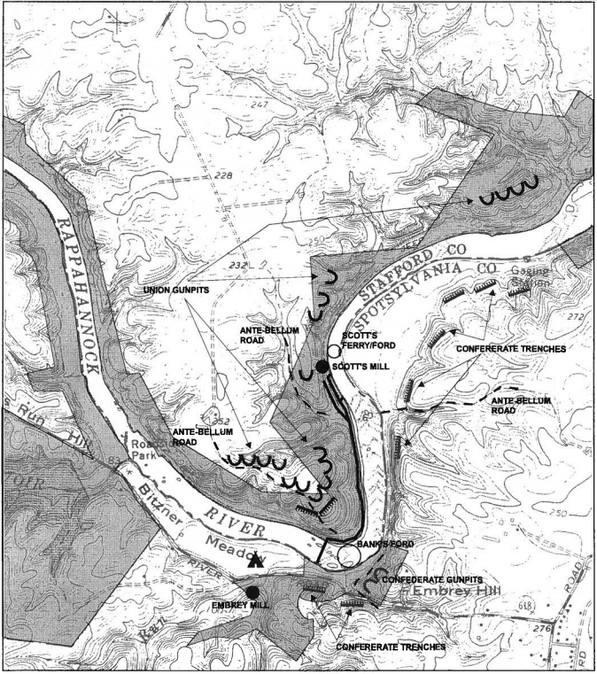
"Military Preparations at Bank's/Scott's Ford"
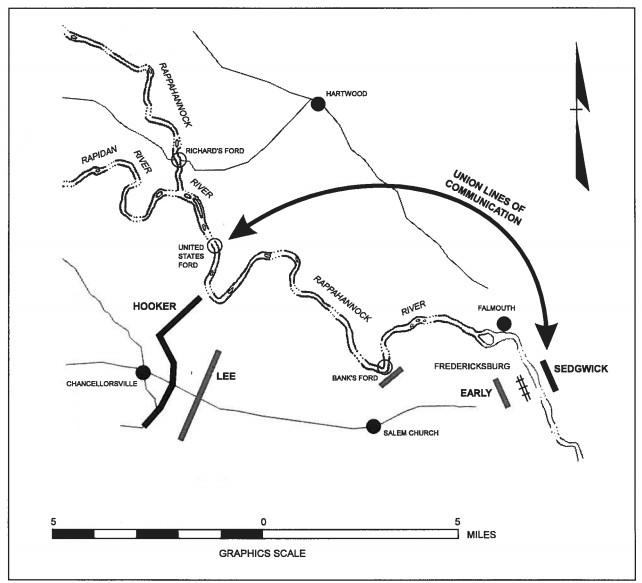
"Tactical Implications of Bank's Ford. As long as the Confederate army controlled Bank's Ford, Hooker's lines of communication were necessarily extended and cumbersome."
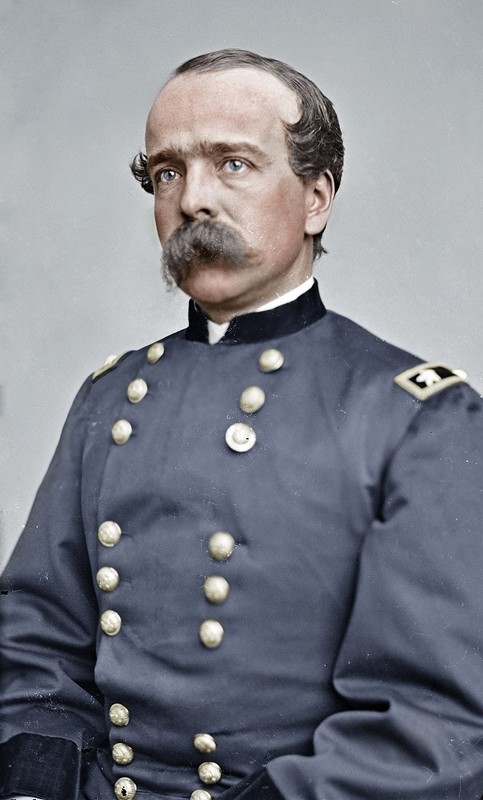
Major General John Sedgwick (Union)
.jpg)
General Joseph Hooker (Union)
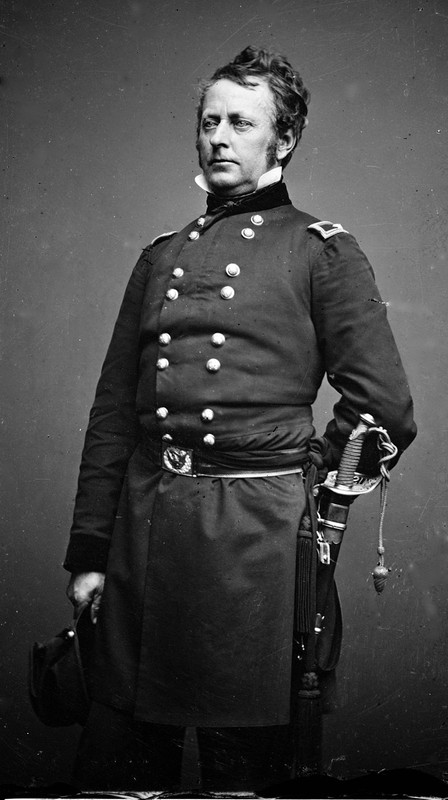
Most of the communication between Sedgwick and Hooker went through Major General Daniel Butterfield who was stationed across from Fredericksburg. Butterfield was acting as the Army of the Potomac's chief of staff.
Colonel Lewis Grant's Vermont Brigade acted as the rear guard for the Union VI Corps and was the last to cross.
.jpg)
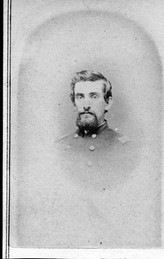
Major Charles Dudley, 5th Vermont
Backstory and Context
Text-to-speech Audio
While Lee’s May 4th assault did not end as successfully as he had hoped, it did contract the VI Corps’ defensive line and convince Sedgwick that he needed to retreat from the field. He had not heard from Hooker and decided he needed to look to the safety of his men. At 6:45pm Sedwick ordered his Corps to prepare for a withdrawal and had Brigadier Generals John Newton and Henry W. Benham (of the Engineer Brigade) set up defenses at Scott’s Ford. The construction of the second pontoon bridge, started in the afternoon, was still underway and Sedgwick began sending his noncombatants and wounded ahead across the one completed bridge.
Sedgwick attempted to mask the withdrawal of his Corps, keeping skirmishers out as long as possible and ordering his men to move quietly. He also had the two bridges (the second was completed after 10:00pm) covered in dirt and sod to muffle the noise of crossing men and horses. Sedgwick withdrew Brooks’ First Division first, pulling the regiments back to a defensive position at Scott’s Ford but not yet having men cross. As the Union men quietly moved sporadic skirmishing broke out along the lines as Confederates aimed towards what they guessed were retreating Federals and the Union returned fire in the dark. Newton’s Third Division also began moving back to the position at Scott’s Ford, keeping their picket lines in place as the main line withdrew. On Sedgwick’s far right, Burnham’s Light Division found themselves isolated from the rest of the VI Corps as the forces to their left withdrew. In the dark officers of the 6th Maine suddenly came upon the approaching battle line of Wilcox’s Alabama regiments. The encounter was so unexpected that more than 150 Union men surrendered instantly while the rest of the division fled to the rear. As the Confederate line of Wilcox and Kershaw’s men took position in what had been Union earthworks Confederate artillery tried to fire on Scott’s Ford.
The last Federal troops to hold their position was Howe’s Second Division. Howe was not immediately in favor of withdrawing because his troops had fought hard to hold and protect their position. There was also growing tension between Howe and Sedgwick over the actions of May 3. Sedgwick ordered Howe to hold his position for an hour longer and then retreat to the defensive position at Scott’s Ford. Howe’s line held their position as a rear guard as the other two divisions withdrew. Then around 10:30pm, with the second pontoon bridge completed, Howe began to file his regiments towards the ford. The Vermont Brigade acted as the army’s true rear guard and engaged in skirmishes with Early’s troops as the rest of Howe’s force fell back.
Just before midnight on May 4, the VI Corps was in place around Scott’s Ford and Sedgwick wrote a message to Hooker for orders. This started a confusing exchange of messages due to delays in communication. Sedgwick first messaged Hooker that his corps was positioned by the ford and pressed by the Confederates. He asked for information from Hooker whether he needed to stay in position to support the actions of the main army or else he would withdraw for the safety of his men. After sending the first message Sedgwick was counselled by other officers to not cross until Hooker allowed it, putting the responsibility for that retreat on the army commander. Sedgwick agreed and sent a second message to Hooker that he would hold his position as ordered, hoping that his second message would be sent instead of the first. Both messages were sent to Hooker in the order Sedgwick wrote them, ten minutes apart. When Hooker read Sedwick’s first message he replied back to the VI Corps commander: “Withdraw. Cover the river, and prevent any force from crossing. Acknowledge.” Sedgwick received this order in a timely fashion, acknowledged his receipt, and began crossing his troops over the two pontoon bridges just before 2:00am. However, Hooker had sent a second message to Sedgwick in reply to Sedgwick’s second message: “Yours received, saying you should hold position. Orders to withdraw countermanded. Acknowledge both.” While Hooker’s first message arrived to Sedgwick quickly, the second message took two hours to get to the VI Corps.
With the first set of orders to withdraw, Sedgwick started crossing his First and Third Divisions over the Rappahannock. Again, Howe’s Second Division was last with the Vermont Brigade still engaged in holding their position as skirmishers. Once Howe’s division was ready to cross, the Vermont Brigade was ordered to fall back. The Vermonters were surprised by this order as they had been unaware of the withdrawal going on behind them and only knew that they were successfully defending their position. Taking precautions to move quietly and prevent the metallic surfaces of their guns and equipment from glinting in the moonlight the Vermont Brigade slowly fell back, halting often in new defensive lines, to the ford. As the rest of Howe’s regiments crossed the bridges, the Vermont Brigade acted as the final defensive line for the crossing.
At 3:20am, Hooker’s second message to Sedgwick, countermanding the order to withdraw, finally reached the VI Corps. By this point the majority of the VI Corps had already crossed and Sedgwick notified Hooker of that fact. With Howe’s division crossed, Colonel Grant began crossing his Vermont Brigade, the last brigade of the VI Corps to cross. Unfortunately, some Vermonters were left behind when the pontoon bridges were cut from their mooring on the south side of the Rappahannock. Major Charles Dudley of the 5th Vermont led the final line of rear-guard skirmishers to the ford only to find the bridges already disconnected. The worst wounded had to be left behind in a barn for the Confederates to capture and the rest of the men found abandoned pontoon boats to cross the river in. With his corps crossed to safety, Sedgwick informed Hooker of his position at 5:00am and 7:00am. At Fredericksburg Gibbon also independently crossed the Rappahannock with his division on the morning of May 5.
General Lee was disappointed that he had not been able to deal a significant blow to Sedgwick’s VI Corps. With Sedgwick across the Rappahannock, Lee returned his focus to Hooker’s main force and marched the troops of Anderson, McLaws, and Early back to Chancellorsville where the Union army had not moved from its defensive position. While Lee planned for another offensive attack on the Federal lines, Hooker had already made the decision to withdraw his army overnight on May 4th-5th. Most of Hooker’s corps commanders voted to stay in position and attack the Confederates in the morning, but Hooker ordered then to prepare to recross the Rappahannock. Hooker’s main force withdrew overnight May 5th and finished crossing early on May 6th, crossing without Lee’s force realizing. The final engagement of Chancellorsville was an artillery duel between guns near Banks’ Ford.
Sources
Furgurson, Ernest B. Chancellorsville, 1863: The Souls of the Brave. New York: Vintage Books, 1992.
Gallagher, Gary W. The Battle of Chancellorsville. National Park Civil War Series. Eastern National, 2007.
Parsons, Philip W. The Union Sixth Army Corps in the Chancellorsville Campaign: A Study of the Engagements of Second Fredericksburg, Salem Church and Banks’s Ford, May 3-4, 1863. Jefferson, NC: McFarland & Company, Inc., 2006.
Sutherland, Daniel E. Fredericksburg and Chancellorsville: The Dare Mark Campaign. Lincoln: University of Nebraska Press, 1998.
Map by Kathleen Thompson
"Historic Resources Along the Rappahannock and Rapidan Rivers." City of Fredericksburg, Virginia. Prepared by: Office of Planning and Community Development and the Graphics Department. September 1997. Accessed June 21, 2021. https://www.fredericksburgva.gov/DocumentCenter/View/1280/Historic-Resources-Along-the-Rappahannock-and-Rapidan-Rivers?bidId=.
"Historic Resources Along the Rappahannock and Rapidan Rivers." City of Fredericksburg, Virginia. Prepared by: Office of Planning and Community Development and the Graphics Department. September 1997. Accessed June 21, 2021. https://www.fredericksburgva.gov/DocumentCenter/View/1280/Historic-Resources-Along-the-Rappahannock-and-Rapidan-Rivers?bidId=.
"Historic Resources Along the Rappahannock and Rapidan Rivers." City of Fredericksburg, Virginia. Prepared by: Office of Planning and Community Development and the Graphics Department. September 1997. Accessed June 21, 2021. https://www.fredericksburgva.gov/DocumentCenter/View/1280/Historic-Resources-Along-the-Rappahannock-and-Rapidan-Rivers?bidId=.
"John Sedgwick." Wikipedia. Accessed June 21, 2021. https://en.wikipedia.org/wiki/John_Sedgwick.
"Joseph Hooker." Wikipedia. Accessed June 21, 2021. https://en.wikipedia.org/wiki/Joseph_Hooker.
"Daniel Butterfield." Wikipedia. Accessed June 21, 2021. `https://en.wikipedia.org/wiki/Daniel_Butterfield.
"Lewis A. Grant." Wikipedia. Accessed June 22, 2021. https://en.wikipedia.org/wiki/Lewis_A._Grant.
"Dudley, Charles P." Vermont in the Civil War. Accessed June 22, 2021. https://vermontcivilwar.org/get.php?input=1836.